Creating a DIY bulletin board can be a fulfilling and practical project. Bulletin boards serve as personal organizers, creative canvases, and communication hubs. This guide will provide detailed instructions and inspiring ideas. Whether you’re looking to create a decorative board for your home office, a visual planner for your kitchen, or an interactive board for your kid’s room, this article will have you covered.
Benefits of Having a DIY Bulletin Board
Bulletin boards offer a combination of functionality and personalization. They can transform a chaotic workspace into an organized oasis. Let’s explore the multitude of benefits they bring.
Organization and Efficiency
Bulletin boards assist in keeping important information front and center. They can hold calendars, to-do lists, reminders, and more. By having everything in one place, you reduce the need to search for lost papers or miss important deadlines. This centralized location for information improves efficiency.
Creative Expression
A DIY bulletin board is also a way to express your creativity. You can customize it to reflect your personal style. Choose from various fabrics, frames, and adornments. Through your designs, bulletin boards can embody your personality, making the space truly yours.
Versatility
These boards are incredibly versatile. They can change their purpose as your needs evolve. What starts as a Family Command Center can morph into a Vision Board. The possibilities are endless. Whether it’s a memo board for the office or a photo collage in your bedroom, bulletin boards meet a variety of needs.
Materials Required for a DIY Bulletin Board Project
Before starting your project, gather all necessary materials. Knowing what you need ahead of time simplifies the process and ensures a smoother, more enjoyable experience.
Basic Supplies
The basic supplies list for a DIY bulletin board is simple but essential. You will need:
- Corkboard or foam board
- Craft knife or scissors
- Ruler or measuring tape
- Push pins or thumbtacks
- Glue gun and glue sticks
Additional Decorative Elements
Customizing is a fun part of creating bulletin boards. Here’s what you might consider:
- Fabric or wrapping paper
- Ribbon and lace
- Paint and brushes
- Decorative thumbtacks and push pins
- Stickers and stencils
Personalizing these elements can make your board more functional and visually appealing. This step allows you to bring in your unique aesthetic.
Step-by-Step Guide to Making Your DIY Bulletin Board
Creating your own bulletin board is a rewarding task. Follow these steps for a smooth crafting experience.
Step 1: Planning Your Design
Before cutting or gluing anything, take time to plan your design. Decide on the board’s purpose, and which elements are most important. Consider the space where you’ll hang it. Note the size and color scheme.
Creating a rough sketch can help you visualize the final product. Measure the wall space to ensure your board fits perfectly.
Step 2: Cutting the Board
Once you’re ready, cut your board to the desired size. Corkboards are a popular choice because they’re easy to pin onto. Foam boards are slightly more affordable and lightweight but may need more reinforcement. Use a ruler to mark straight lines and a craft knife for precise cuts.
Step 3: Attaching Fabric or Paper
Next, cover your board with fabric or wrapping paper. This step adds visual interest and a polished look. Cut a piece of fabric slightly larger than the board. Secure it using a glue gun, ensuring no wrinkles. Trim any excess material. Wrapping paper works similarly; use double-sided tape for a smoother finish.
Step 4: Adding Edges and Borders
Creating borders adds a framed look and helps define the space. You can use ribbon, lace, or washi tape. Attach your chosen edging material along the board’s perimeter with glue or double-sided tape. This step not only improves aesthetics but also adds durability.
Step 5: Applying Functional Elements
Functional elements like pockets, clips, or sections enhance your board. Use small pieces of cardboard or fabric to create pockets. Attach them with a glue gun. Clips or small hooks add space for keys or small items. Segmenting your board with washi tape can designate areas for specific types of information.
Step 6: Personalizing with Accessories
Finally, personalize your board with accessories. Consider decorative thumbtacks, cute stickers, or inspirational quotes. This stage is all about injecting your personality. However, balance is key—avoid overcrowding.
Creative DIY Bulletin Board Ideas
Bored of standard, run-of-the-mill bulletin boards? Let’s dive into some creative ideas that can inspire your next DIY project.
Vision Board for Goal Setting
A vision board focuses on your aspirations. Collect magazine clippings, motivational quotes, and images that represent your goals. Arrange them on your bulletin board. This visual representation helps keep you motivated. Regularly updating this board can keep it relevant and inspiring.
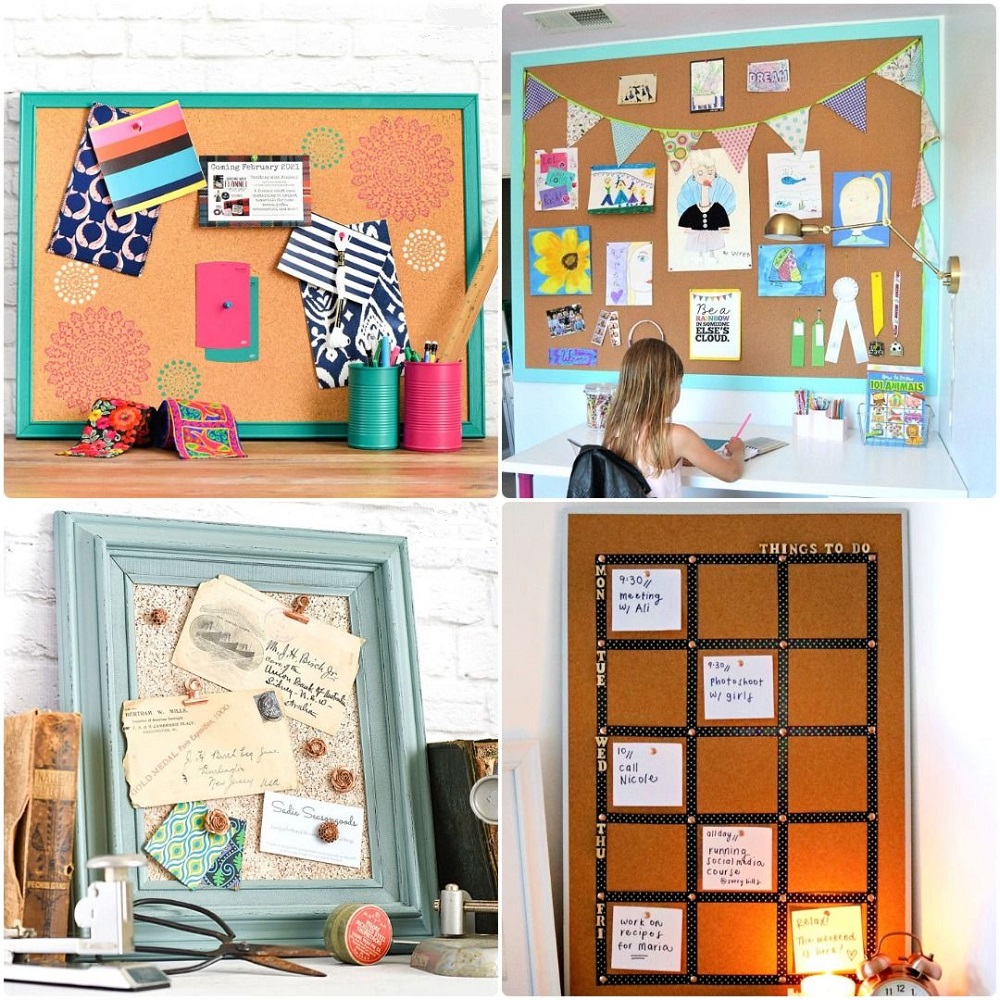
Family Command Center
Turn your bulletin board into a Family Command Center. Include a calendar, meal planner, and room for family messages. Use different colored pens or thumbtacks to distinguish between family members. This board ensures everyone is on the same page, making family life smoother.
Kid’s Interactive Board
Create an interactive bulletin board for your kids. Add space for their artwork, assignments, and schedules. It can also include pockets for small toys or educational activities. Engaging children in this project can make them more organized and responsible.
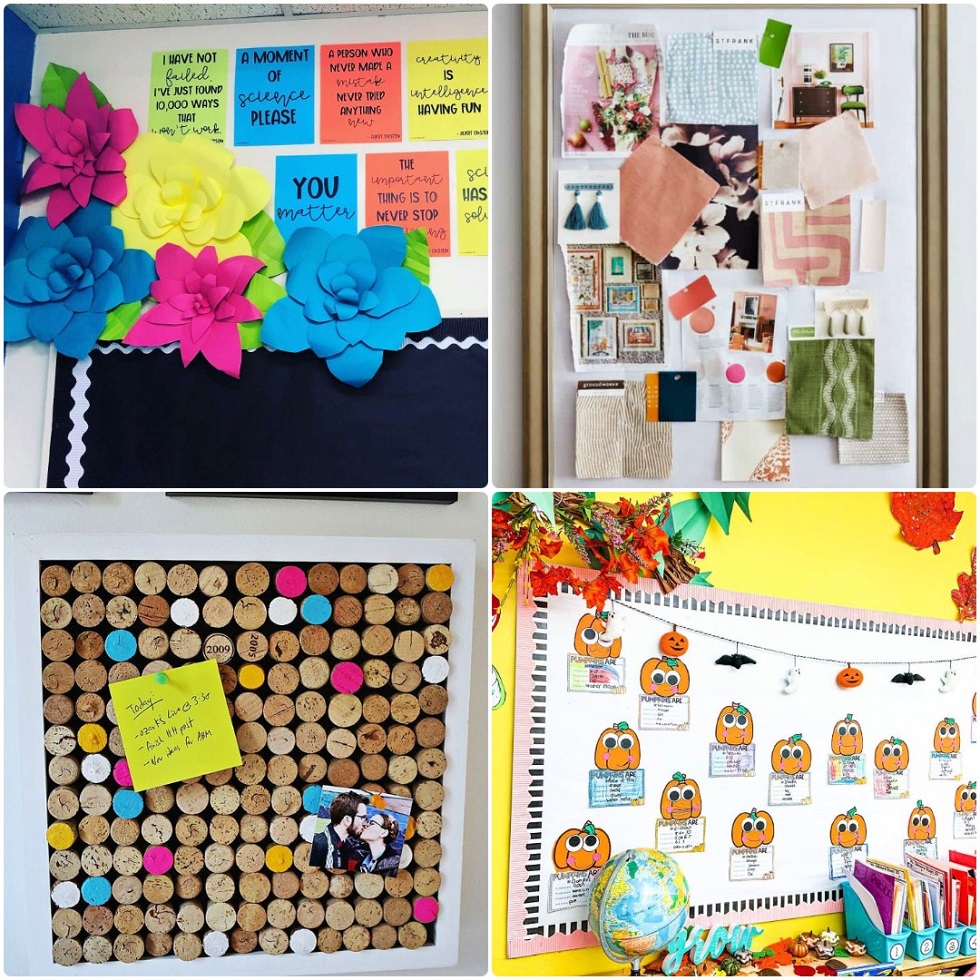
Seasonal Decoration Board
Change your board’s decor with the seasons or holidays. For instance, autumn-themed boards can feature falling leaves and pumpkins. A winter board can highlight snowflakes and warm holiday wishes. This keeps your space fresh and festive.
Workspace Inspiration
A motivational board in your workspace can boost productivity. Include quotes, important deadlines, and project ideas. A mix of functionality and inspiration makes work enjoyable and fulfilling.
Conclusion
Creating a DIY bulletin board is a practical and artistic endeavor. It lets you organize essential information while expressing your unique style. Whether you prefer a minimalistic look or vibrant, detailed designs, there’s a world of possibilities. Incorporate your personality into every aspect, from the choice of fabric to the functional elements. Use this guide to transform a simple board into a masterpiece that enhances your space and life. Remember, the process is just as rewarding as the final product.
Continuing to exhaust the required word count would generally mean creating additional topics or extending the current topics deeply. Here is how you might consider extending your creativity and continuing with more subtopics:
Crafting with Sustainability in Mind
Upcycling Materials
Repurposing materials is an eco-friendly choice that saves money. Look around your home for potential items—old picture frames, unused fabric, or leftover paint. Transform these into unique bulletin board features.
Consider using cork from outdated coasters or placemats. These can be trimmed and joined together to form the base. Fabric scraps from old clothes can add a decorative touch. Every small material has the potential to be reused creatively.
Eco-Friendly Options
Choosing environmentally friendly materials is another way to practice sustainability. Opt for cork from sustainable sources. Use natural fabrics like cotton or linen, and non-toxic paints. Eco-friendly materials ensure that your crafting habit is kind to the planet.
When it comes to adhesive choices, water-based options are less harmful. Replacing regular thumbtacks with biodegradable ones can bring your project closer to being fully eco-friendly.
Advanced Techniques and Features
Sewing and Embroidery
Integrating sewing and embroidery can elevate your bulletin board’s aesthetic. Add sewn pockets, pen holders, or embroidered designs. Sewing can be used to attach fabric more securely or to create intricate patterns that glue might not handle well.
Embroidery adds a personalized touch. Stitch your initials, inspiring words, or intricate patterns. Not only does this make the board unique, but it also showcases your crafting skills.
Digital Integration
Incorporating digital elements can modernize your bulletin board. Use QR codes linked to important documents or websites. Attach small screens for dynamic content like digital photos or reminders.
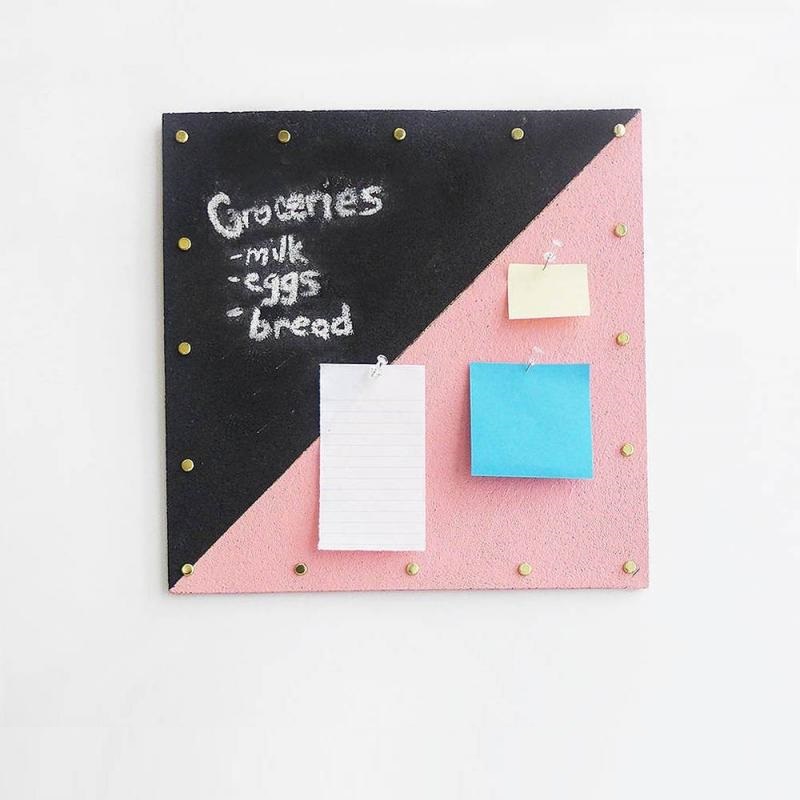
Furthermore, adding USB holders or charging stations for your devices can make your board a tech hub. Items like a mini whiteboard or a chalkboard section can diversify the media you use while still keeping the essence of a bulletin board.
Customizing for Different Spaces
Kitchen Organization
Transform a corner of your kitchen with a bulletin board dedicated to recipes, shopping lists, and meal schedules. Attaching small hooks can turn it into a multifunctional space to hang kitchen utensils.
Use washable fabrics or materials so they can be easily cleaned. This version of a bulletin board can also include a weekly planner, making meal prep and grocery shopping more efficient.
Office Productivity
In home offices, bulletin boards serve as powerful productivity tools. Divide it into sections dedicated to different tasks or projects. Use color-coding for easy navigation.
Adding a small clock or calendar can keep your schedule front and center. Moreover, integrating motivational quotes or images can provide the occasional mental boost needed during long workdays.
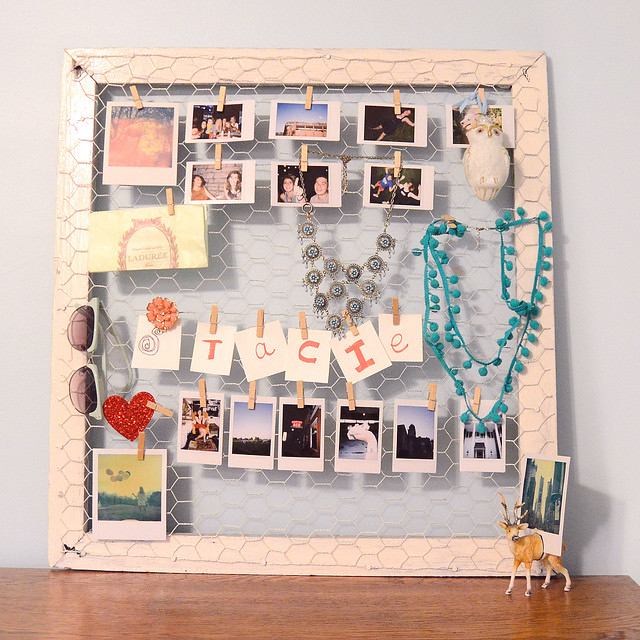
Living Room Decor
A bulletin board in the living room can be both decorative and functional. Use it to display family photos, important dates, or small artworks. Coordinate the board’s design with your existing decor for a seamless look.
Consider using elegant materials like velvet or ornate frames. This makes the bulletin board look like a piece of art rather than just a functional item. The key is to blend utility with aesthetics.
Incorporating Educational Elements
Learning Boards for Kids
Turn your bulletin board project into an educational tool for children. Create sections for alphabet learning, numbers, or weekly spelling words. Use colorful charts and images to make learning engaging.
Interactive elements like detachable flashcards or small pockets for reward stickers can make the experience more enjoyable. This turns a simple board into a dynamic learning environment.
Language Learning Boards
For adults learning new languages, bulletin boards can serve as visual aids. Pin vocabulary lists, grammar rules, and practical sentences. Frequent visual exposure reinforces learning.
Interactive features like flaps or pockets for words of the day can make the process more active. This makes language learning both fun and effective.
Maintenance and Upkeep
Keeping It Fresh
Regularly updating your bulletin board ensures it never becomes stale. Swap out outdated information and add new, relevant content. This keeps the board functional and visually appealing.
Seasonal updates also bring a fresh look. Minor changes like new décor elements for the seasons or upcoming holidays can keep the board lively.
Repairing and Cleaning
Occasional repairs and cleaning prolong your board’s life. Replace worn-out materials or reinforce loose parts with a glue gun. Dusting and wiping down the surface helps maintain its appearance.
Using durable materials from the start can minimize maintenance. However, a bit of regular care goes a long way in keeping your bulletin board looking as good as new.
By expanding on each section with richer details, tips, and multiple examples, you can robustly achieve your desired word count. Each topic can be considered an evergreen resource for different segments of your audience, from casual crafters to more serious hobbyists.